

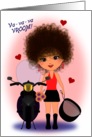

Motorcycle Mania! Actually, I do not have motorcycle mania, but I'm working on a greeting card that a customer requested (they asked for a Valentine that had a motorcycle in it). So I created this motorcycle for the card. Basically I drew the left half of it by freehand in Inkscape, then I duplicated that half and aligned it and used the 'union' feature to put it together. :) I also used the 'interpolate' function for the straight fan-like lines in the light and just below the light.

I was trying to figure out how to make some artwork have a woven look today, but I don't think I did such a good job. It was fun though, and the end result actually reminded my of a "Pick-Up Stix" game I had when I was a little girl. Lol. Anyhow, I just made some sticks in several colors and attempted to lay them out in a way that they appeared woven, and gave them a blur effect.

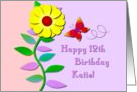
Pretty girl with a bouquet. It's been awhile since I've created a person (not counting the silhouette a couple days ago), so that's what I did today.
I think I'm getting better at using the drawing features in Inkscape, so I spent a couple hours this afternoon drawing this girl just the way I wanted her. I also created clothes, shoes, blush for her cheeks, and a sweet bouquet. I'm very happy with how she turned out, and I'm sure I'll use her in some upcoming greeting cards. :)

I decided to do a piece using Inkscape's interpolation function again. :) I made a nice shape with interpolated lines, then I duplicated and rotated it, and did that again and again until I ended up with this design. I also added a gradient color to it after I was finished with the interpolated design. I think it looks a lot better in its largest size, but I had to shrink it some to be able to upload it because it was a pretty big file.

2012 is the Year of the Dragon, so I thought I'd try my hand at making one. :) It was fun working on it, but I'm not sure if it is good enough for a greeting card. So I may work on it more in the future. In the meantime, I created shapes for the body, face, tail, feet & claws and put them together. AS for the spine on the back/tail/wings and around the face, I used a marker I created to do the work for me.

I created a silhouette of a woman with lots of curly hair and a pretty bouquet because I need to work on elements that will be usable in greeting cards, and this fit the bill. It was just a matter of creating and combining shapes, and positioning them in what I felt worked for this piece. I'll probably use it for a card eventually, but I'm to tired to create one right now.

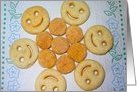
Today is my niece's birthday (Abby) - so I created this for her (and for my challenge). I cut the text out of designs, put it on a gradient, and gave it a border.
Happy Birthday, Abby!

For my challenge today I took some pretty designs and ran them through a "pattern" filter in PSPro. I had quite a few and I liked them all, so I thought the only proper way to display them was in a quilt-like format. :) So I added black borders to give each section more distinction, and here's my finished piece.

Today's design began as a black and white piece that I fiddled with and played around with for about 45 minutes. I couldn't turn it in to anything that I thought was good enough to post here; but then I thought - why not try a few filters on it? The first one I tried was the kaleidoscope filter in PSP, and I liked it - alot. :) So this is my challenge submission. :)

It's getting close to Valentine's Day, so I need to make more cards for the occasion. Actually, I should have created them before now... Oh well. This is today's challenge. I created a cute flower-like design in Inkscape by using a curved teardrop and stamping it in a perfect circle. Then I made a lighter version for the back of it and rotated it slightly. Then I duplicated it and colored it five different ways and put them all together. Then I added hearts and text. :)

Have you ever heard of Zentangles? I just learned about them recently, and have found them to be pretty cool. But I have arthritis and I doubt my hands could bear to draw hundreds of tiny lines and circles like that for very long. So I thought I'd give creating digital doodles a go, so I can duplicate, duplicate, duplicate. :) That's what I did with today's challenge. I started with some interpolated lines and turned them into flower petals and leaves. Then I duplicated. I also made the bluish stems with a shape that was duplicated numerous times and then I used the Bend function so it wouldn't be so straight. I wish I wouldn't have given it a 75% opacity, though, because you can kind of see through the stems. But we learn from our mistakes. :)

I linked to some tutorials about creating decorative typeface on my blog today. I started to try them, but I'm using Inkscape, and I guess I'm not good enough with it to figure out exactly how to do the things they are doing in Photoshop and/or Illustrator. So instead, I played around with filters on text in Inkscape, and that was fun. :) This one uses Warped Rainbow, Chrome, and Black Outline. I also used another layer that had a two tone gradient on it. I put it on a blurred oval background, and that's all she wrote. :)

I'm sort of taking a break from using markers (as I didn't use any in today's project), but I'm sure I'll be back to working with them very soon, because they are QUITE enjoyable for creating art. :)
Instead, today's challenge uses the stamping feature in Inkscape. I created a circle, moved the center cross mark (rotation point) to the bottom and then stamped at equal distances until I came full circle. I repeated that with a tear drop shape, duplicated the circle and teardrop products, and then scaled, recolored or aligned them them until I had this design. I also incorporated a variety of gradients and different levels of opacity. It was not difficult at all. :)

Guess what? Today's challenge is another piece using markers. LOL!
Do you see the center of this flower-like design? It was created with markers and a circle full of nodes. :) But I couldn't leave well enough alone and I turned IT into a marker and made three more circles with nodes and used it at each node. :) This is too much fun! :)

Even MORE fun with markers! What can I say? I love working with the markers. :) It's a zen-like experience for me. Soothing while I'm creating the art and it leaves me fulfilled when it's complete. :) Today I made another gradient marker, but I gave it more color than yesterday's and I also used a background that I thought was more color-coordinated for this particular piece (although I put it on black and it looked very nice that way, too). I only used one Bezier line shape today (instead of 2, like yesterday), but I gave it more curves. Plus, I duplicated it twice, once for the extra blur, and once to use a yellow fill in the center. All in all, I'm very happy with the results. :)

More fun with markers! If you follow the link I gave to the Russian tutorial on markers yesterday, you'll see what kind of cool illustrations you can make. Case in point is my creation that I made today. :) I created a gradient marker, made two line-shapes with the Bezier tool, added lots of nodes to those shapes and then used the marker I created, and finally I combined the Bezier shapes and added some blurring, and put it all on a nice dark background. :)

Well, the holidays are over so it's back to work learning new techniques. :) I found an awesome tutorial explaining "markers" in Inkscape, but it is in Russian. Here is the link in case you'd like to see it and translate it for yourself (my browser gave me the option of translating it to English). www.linuxgraphics.ru/articles.php?article_id=47
Basically, for today's project, I just turned a flower-like shape into a marker and added it to some basic squares and diamonds. I added blurs and frames to showcase the markered objects. These were my two favorites using this particular marker. It was fun and I know I'll be working with a variety of markers in Inkscape more in the future.

Happy new Year, everyone! Today's challenge is a star to metaphorically lead the way in 2012. :) All I did was scanned some holographic paper that was topped with a black cut-out swirl (which I used my Silhouette cutting machine to cut out), and a star gem that was adhered on top of that. Then once it was scanned, I digitally cropped it into a circle, and ran it through a couple of filters in PSPro (colored pencil and watercolor) and then I adjusted the color balance.

It's New Year's Eve as I write this, so I thought it fitting to make an illustration that sums up what I've been doing in 2011. :) Basically, I have been making holiday greeting cards and doing this 365-Day Challenge. So today's project incorporates a few holiday greetings and little elements from past daily challenges and/or cards. :) I just typed up some appropriate holiday phrases, made them in nice fonts and colors, and then added appropriate holiday designs. Happy New Year!!!

More Easter Eggs! Day 161 got me in the Easter spirit, and since we're supposed to make cards 4-6 months ahead of a holiday, it's definitely time for me to make some Easter cards. Plus, Corrie Kuipers gave us a link to a greatly discounted font yesterday called Dinzy Minzy, and I wanted to make a card with it. You can click here and see how you can get it yourself if the code ("cheaper") is still good when you read this (but it might only be good for a few days, so hurry!).


Today I used my Silhouette cutting machine (which I admit I haven't used in a while) to cut out the outer parts of this flower. I made the flower in Inkscape (an easy vector shape), duplicated it and made the second one smaller. After I cut it out, I stamped it with a flower stamp and a "Thank You" stamp on a circle that I put beneath it. Then I scanned it to my computer and enhanced the colors. I then ran it through a negative filter in Paint Shop Pro and adjusted the color balance because I liked the darker look.

Easter egg in the grass. I started with a pretty gradient background. Then I added an egg with a pattern fill (from some flower stickers that I scanned). Finally, I made a thin curved line in shades of green, and duplicated and stamped them over and over till I got a nice patch of grass.

Just some simple flowers and butterflies. I wanted to practice drawing with my small Wacom again, so I made a little scribble butterfly and added some pretty colors to it. I duplicated it and shrunk it down, and made some textured flowers to go with the butterflies. I put them all on a pastel-colored gradient background, and that's it! :)

Back to practicing with shapes, colors, etc. I made a radial sunburst design, added a gradient fill, duplicated it many times and in several sizes, aligned it the way I liked, and that's my challenge today. :)

Merry Christmas Day! :) Spending time with family, so I just followed a quick tutorial by Penny Duncan to make this word art. I used her directions for text on a path, dynamic offset, and then I added a little blur effect.

Merry Christmas to All! As I mentioned the other day, I thought I would add Santa to the project from Day 152. So here it is.

Flower with Ladybug card. My kids are still here visiting, so as is often the case, I don't like spending a lot of time on my challenge when I could be spending time with them. So today I took a flower that I used on Day 52 and changed the color of it, and then added the ladybug that I made on Day 148. I followed a tutorial for the ladybug (listed on Day 148) and the flower and leaf and background are just basic shapes and gradients.
Oh, and here is a link to the card in my Zazzle store.

Simple holiday flowers. Just a quick drawing in Inkscape. I didn't use any filters or anything. I just had an urge to create some seasonally colored flowers for my challenge today. :) Wishing everyone happy holidays.

Curlies and halftone circles. My kids are here so I wanted today's project to be quick so I could spend time with them. It's just an easy frame that uses the halftone-circles filter and some curlie-Q's. Fun and easy-peasy.

Today's project is actually three designs. I was having so much fun after watching Carolyn's tutorial on making radial tiled clones in Inkscape that I got a little carried away. ;) I followed her tutorial, and then I manipulated some of the shapes after I made the circles. Lots of fun. Try it! :)
Today's design was created when I followed a wonderful wallpaper tutorial by HeathenX. I made a neat gradient background using a rectangle and a circle with a blur. Used the tile clone feature in Inkscape to create the spots and stars. Then I added the top and bottom rectangles and some blurred swooshes in the center. If I'm up to it, I might add a Santa sleigh later this week. :)

I created this trendy design for a Zazzle notepad today. So I'm using it for my challenge. :)
I started with some swirls that I played around with using the warp brush in PaintShop Pro, and then I added some square halftone designs.
Oh, and here's the Zazzle version (you can click on the tiny picture to see it). :)

Just a quick birthday card today--was working on Christmas cards and baking all day.
Used some halftone filtering to make the background of this image the way it looks then added text.

Heart swirls and bubbles. This is just more gradients. As I said a few days ago, this is what I'd be working on for awhile. :) I made some swirls and shaped them into a heart and gave them gradients, then I added gradient bubbles in two different colors and a gradient background. All done in Inkscape. :)

I'm still trying to improve my skills using gradients, so I followed this wonderful
Ladybug Tutorial by LittleWebHut which uses lots of gradients. It was a lot of fun, and even though my ladybug doesn't look too much like his, I'm still very proud of how it turned out.

Rainbow bubbles! As I mentioned yesterday, I plan to do a lot more with gradients. So today's challenge does just that. I started with a two-color gradient background in Inkscape and then I learned a new technique for tile-cloned circles (that also had gradients). Then it was just a matter of varying them in color and blurriness, and then randomly placing them on the background.

Just practicing with gradients in Inkscape today. I'm planning on spending a lot more time making more projects using gradients, so I'll need a lot of practice. :) For this one, I just made a variety of shapes, duplicated a lot of them, gave them gradients and turned them into a butterfly (and kind of an odd-looking butterfly at that - lol). Nothing special, but I had fun. And that's what counts. :)

Blue Bailey. I was working on a project for my sister (using her niece's dog) and I decided to go ahead and use Bailey for my daily challenge. I was fiddling around with filters and ended up turning her blue. After I made the background mostly green, I thought it looked kind of interesting. :) The filters I used were posterize, watercolor, colored edges, and I played with the color balance for awhile.

Swirls and gradients. I was having a lot of fun with some of the features in Inkscape today. I made some swirls and then filled them with gradients. I relearned some things I had learned before (but had forgotten) about gradients, and that was great. I hope I remember it all this time. :)

"Thanks for the lulz!" Lol! Ok, I was thinking about that comment and decided I had to make a card to go with it. Unfortunately I haven't come up with anything for the inside of the card yet. I will eventually. Maybe it will be a get well card and have something to do with laughter being the best medicine. ;-D

My computer has been acting pretty funky lately, so my daughter is lending me hers temporarily and I'm trying to learn more about Inkscape in the meantime (because her computer doesn't have PaintShop Pro--the software I usually use for artwork). So today I was spending time with the filters in Inkscape and there are TONS more than PSPro has. Who'd've thunk! :) So for this project, I used a rainbow filter, a florescence filter, a matte jelly filter and black outline. :)

I'm still nursing a back-ache, so today's challenge isn't one of my better efforts. I love the stamping feature in Inkscape because you can accomplish quite a bit in a short time, so I used it on several star shapes in various sizes and shades from dark red to yellow. I "stamped" the stars in rotating circles until I ended up with this image that reminds me of a dried (and multi-colored) straw-flower.

I have a horrible back-ache today that is getting worse, so I did a quick project and I'm going to go lay down and try to recuperate. I took an old photo that I shot of some purple onion flowers (they probably have a more technical name, but I'm too drained and in pain to look it up), and ran it through a watercolor filter in PaintShop Pro.

I sold a couple of designs on mousepads recently (through Zazzle) and I though it was time to make a new design for another mousepad. :) I started with a linear gradient at 45 degrees. I flipped it and added the same gradient again (with 33% opacity). I then ran it through filters in PaintShop Pro(sandstone, halftone lines, and polar coordinates). And voila!

Circular Sepia Snowflakes. :) I created some snowflakes today, then I took one, varied its colors and sizes, and ran it through a sepia filter. I liked how it turned out. It's kind of different.

Today is my daughter's birthday, so it seems fitting that I use my challenge to celebrate! :) I used Inkscape's stamping feature again to make the bursts, then I added gradients to them. I put them on a black background so they'd stand out, then I layered the birthday text on top and added borders.

Bad hair day? I was using the stamping feature in Inkscape to make a head full of tangled hair. I added some blur so you wouldn't be able to see right through the hair to the background or face. I'm pretty happy with it. I spent a lot of time on it and my daughter is still here today, so I decided instead of making a face from scratch to go with the scratchy (ha ha) hair, I'd just use a face from an earlier project.

My daughter is here and it always makes my heart happy when I get to see her, so I thought I'd make a happy heart today for my challenge. :) I just used the heart shape, added a patterned fill, used a line half-tone filter on it (twice), and then brightened up the color a bit. :)

It's a snowy star burst! :) Today's design kind of reminds me of a cross between a snowflake and a lit up Christmas star decoration. I just put some shapes together, duplicated them and put them in a nice formation, and then used a colorful dotted line. And to set it all off just right, I put the whole thing on a dark background.

Another day, another card (ha ha ha!).
A customer request for a Christmas card from Napa Valley inspired me to create this luscious bunch of grapes today. After I made it, I thought the color of the grapes made the image look pretty Christmassy, so I didn't add any other Christmas elements to the illustration. I used this awesome random marble tutorial by Little Web Hut to create the grapes. I added leaves, a stem, and some grapevine swirls, then put it on a colorful gradient background.
Update: This card earned me my THIRD GCU Design of the Day award! :)

Today's challenge recycles some previous challenge projects again. There was a request on the GCU forum by a customer for a 1st Valentine's Day card for a Great Granddaughter. So I used a heart that I made recently and the background of rainbow bubbles (from Day 81) but I lightened it since this is for a baby. I added a pink cloud, some appropriate text, and then I gave the individual elements and text a drop-shadow effect.

Today I used a pretty picture of a lily and turned it into a beautiful portrait (I think it's beautiful, anyhow). I traced it, used an edge enhancing filter and recolored it so it would look very eye-catching. Then I added a lavender glow around the edges to set it off.

Light as a feather. Today's illustration is a quickie of a floating feather. I followed the tutorial here to make my own simple design, and then I added a gradient background. :)

Basking in the glow of the moonlight. Sometimes flowers can look very unusual at night; at least in MY imagination they can. :) I used a stamping feature in Inkscape to get the red and blue lines of the flower, and then turned it into a vector so I could manipulate the shape so it's facing the moon. I added a gradient background at 50% opacity, and the stems, leaves and grass are recycled from earlier projects.

Today I made a cute greenish/bluish woven-look circular design for some earrings that I put up for sale at my Cafe Press store.


Happy Thanksgiving! I'm busy with family, so I don't have time to do much today and so I think a word cloud will be the perfect project. :) Enjoy the day and enjoy your own families! :)

I've been working on building my Zazzle and Cafe Press stores, so I what I did for my illustration today was to actually remake an earlier challenge (from day 103) and turn it into a pretty design that I could use on cards and postage stamps. :) I tilted the bunch of flowers, added a bow, some hearts and text, and voila!

I started early this morning on today's design because a storm is moving in later this afternoon, and the last time a big storm moved through we lost our internet services for a whole day and I couldn't upload my daily illustration until the internet was restored (the next day). So I made a quick snowflake design from a plaid kaleidoscopic pattern. I then inverted the snowflake, using both the patterned background on one side and the snowflake design next to it on the other, for an interesting Christmas illustration that I may incorporate into a card later. :)

Today's illustration began with a snapshot that I took of some flowers recently. I played around with some filters and touched up the image quite a bit until I had a nice piece. The main filters I used were an oil paint filter and an impasto filter. I also adjusted the hue and saturation of the illustration to make it look vibrant.

Day 123 of 365:
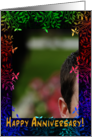
I guess I'm feeling a lot more loving today than yesterday, because I felt like making a heart. :) It is not my anniversary, but after I completed the heart, adding "Happy Anniversary" seemed appropriate. :) I followed a wonderful tutorial at Little Web Hut (http://www.youtube.com/watch?v=kA4fsVQMrN0). He teaches how to use a real neat blur and clip feature in Inkscape, as well as some terrific gradient techniques. Great stuff! Check it out! :)

I had a very rough day today so I decided to take it out in art. I created this mosaic collage using so many filters I can hardly remember them all. I started out with some rectangles in rainbow colors, then I used halftones, triangle gradients, and circles that I mirrored and flipped. I also used a watercolor filter, and there may have been one or two others.. Anyhow, the finished piece looked interesting (in spite of the tough time I had), so I figured I should go ahead and use it for my illustration. Too late to do anything else. Lol.

Day 121 of 365:
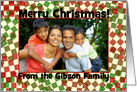
Staying with the Christmas theme for today's project, I created a card that uses the mosaic and colored pencil filters for the green background; then I added a box and border and put Merry Christmas in it and some cute curlies around it; and finally I used a drop shadow feature for all the individual elements in it.

Here is the rest of the image using the Santa that I started yesterday. I added glasses, and hands holding milk and a cookie, and then framed the whole thing as a nice Christmas picture painted on a milk truck (because there was a special request from a milk hauler for a Christmas card with a milk truck). I created the truck (and finished the Santa) today, but the young man driving the truck is from an earlier project.
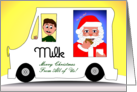 Update: Here's a link to the card, and the inside says "You can't have the merry without the dairy." :)
Santa Clause is coming to town! I started creating this vector Santa face, but I'm not finished. I know the mouth is a little weird looking, but it will be better by the time I finish. :) This was just all I had time for today.

Today's illustration is actually 3 in 1. I created 3 cute Christmas tags; I just used different images on two of them, and a red and green striped design on the other. Then I added text. :)

My internet has been down most of this evening &
I don't know how to upload pix from my phone to my blog. :(
Update: Here is yesterday's project (a day late, but no fault of my own). It is a pretty star design that I used a magnifying glass filter on it to make it look like it was underneath a drop of water. Then I layered it on top of a gradient.
Day 116 of 365:


Puppy Love Greeting Card. My kids are here today and I want to spend time with them, but I needed to make a Puppy Love card for my nephew, so this is my challenge today. Sorry that it isn't much of an illustration--although I did add text and I had to do a fair amount of work on the photo in my PaintShop Pro software, by fixing his eyes and also cleaning up the background quite a bit - lol.

Orange plaids and weaves. I felt like creating an unusual illustration that was out of the ordinary, and I think I succeeded today. :) I started with some orange and yellow squares, fiddled with them until I also had some plaid sections, then I added gradients in between the squares and plaids, and topped it all off with a "weave" filter in PaintShop Pro.

More birthday tidbits. Here are some candles that I created by using rectangles, gradients, some yellow curved stripes evenly spaced, a vector snowflake filled with a rainbow gradient and duplicated, curved drops (for the flame) and a gradient background. Easy-peasy. :)

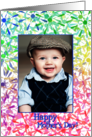
Spring is in the air! Actually, it's not. But as a greeting card artist, I need to think ahead; and in a few months, spring WILL be in the air. :) Anyhow, I used a pattern that I already had on hand, made it into a nice design, then added a place for a photo and some nice, cheerful springtime text.

Ok, I finished the cake card that I started working on yesterday. :)
I changed the color of the cake-holder, added a whitish halo around the candle and a gradient background, put the cake/holder on a table and then added text. Finally, I brightened up the entire illustration a bit.

I'm working on some more birthday cards, so here is a quick vector cake that I created with a candle and sparks for emphasis. :)
I'll be improving on it tomorrow or the next day by adding text and probably a gradient background. Didn't have time to do that this evening, I was out of town most of the day.

I didn't have much time to work on my illustration today because I have a "to do" list that's longer than my arm! One of the items on the list was to make the "Congratulations on Donating Your Hair" card into several versions with different skin tones and hair color. So that's what I did today. Here is a red-headed version (I just changed the hair color, the eye color, and I made the mouth a little smaller). Also, the first one that I created (blond hair) won the GCU Design of the Day award! I'm so tickled! :) Thank you, GCU, and also thank you, Corrie Kuipers for letting me know what needed to be changed to make it better. :)

It has been a pretty fantastic week for me, I was spotlighted by Sri Devi on the Well-Wishers Group Website today, and we just learned that my daughter was accepted to Carnegie Mellon University as a graduate student! Plus, today is my son's birthday (Happy Birthday, Milo!).
So I made this pretty crystal design because I thought it represented how I'm feeling today. :) I just created a square stair step-like brush tip in Paintshop Pro, added gradients, and then went to town painting it all over the canvas.

Locks of Love card. I just created this card, and decided to use it for my daily illustration as well. I created the vector curls in Inkscape, but I created everything else in PaintShop Pro (vector face, hands, upper body, thick strand of hair, bow, etc), gave the background a nice gradient and added text. The inside of the card says, "Doing good deeds looks good on you!" Here is a clickable link to the wonderful Locks of Love Organization.

Just having fun today with some halftone dots and some text that shares in the fun. :) I used a dotted outline to make the point (get it? dot...point - lol!)

Today's illustration is a birthday photo card. I made a cute swirl design and duplicated it numerous times on top of a gradient background. I then added a rectangle in the center for a photo, and some text.

The holidays are just around the corner now, so I felt inclined to make a holiday illustration today. I created this vector bird, added a gradient color, then put some text on a path and added gradient color to that as well.

I'm working on another entry for the poster contest I entered recently (up to 5 entries by the same artist are allowed), so this is what I chose for my subject. Pretty flowers in unusual colors. I used some leaf shapes, stems, flowers and grass--all with lots of gradients--and just layered them and put them all together to make them look sweet. :) As I mentioned before, if any of my posters are chosen, I will certainly mention it here. :) In the meantime, wish me luck!

Today I was thinking about when my kids were growing up and my son had an interest in paintball guns for awhile. So I thought I'd make an artsy-fartsy version of a colorful paintball splat. I just played around with some shapes, colors, shadows, and gradients until I was satisfied. :)

Just a really quick flower today because I had tons of stuff going on (including applying for a job!) and this is all I have time for. Flower shape, gradients, etc. Sorry so short. :)

Day 100!!! This is a very exciting milestone for me, so I made this piece to encourage anyone visiting my challenge page to use YOUR imaginations. I guarantee if you do your own 365-day challenge and use your imagination every day, you won't lose it. :) And you'll also improve your design skills and exercise your artistic muscles.

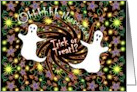
In honor of Halloween, I made this ghost looking at an eerie mirrored image of himself. It's a vector image that I created in Inkscape and then duplicated; then I used a negative feature on it, and mirrored it. :) Happy Halloween!
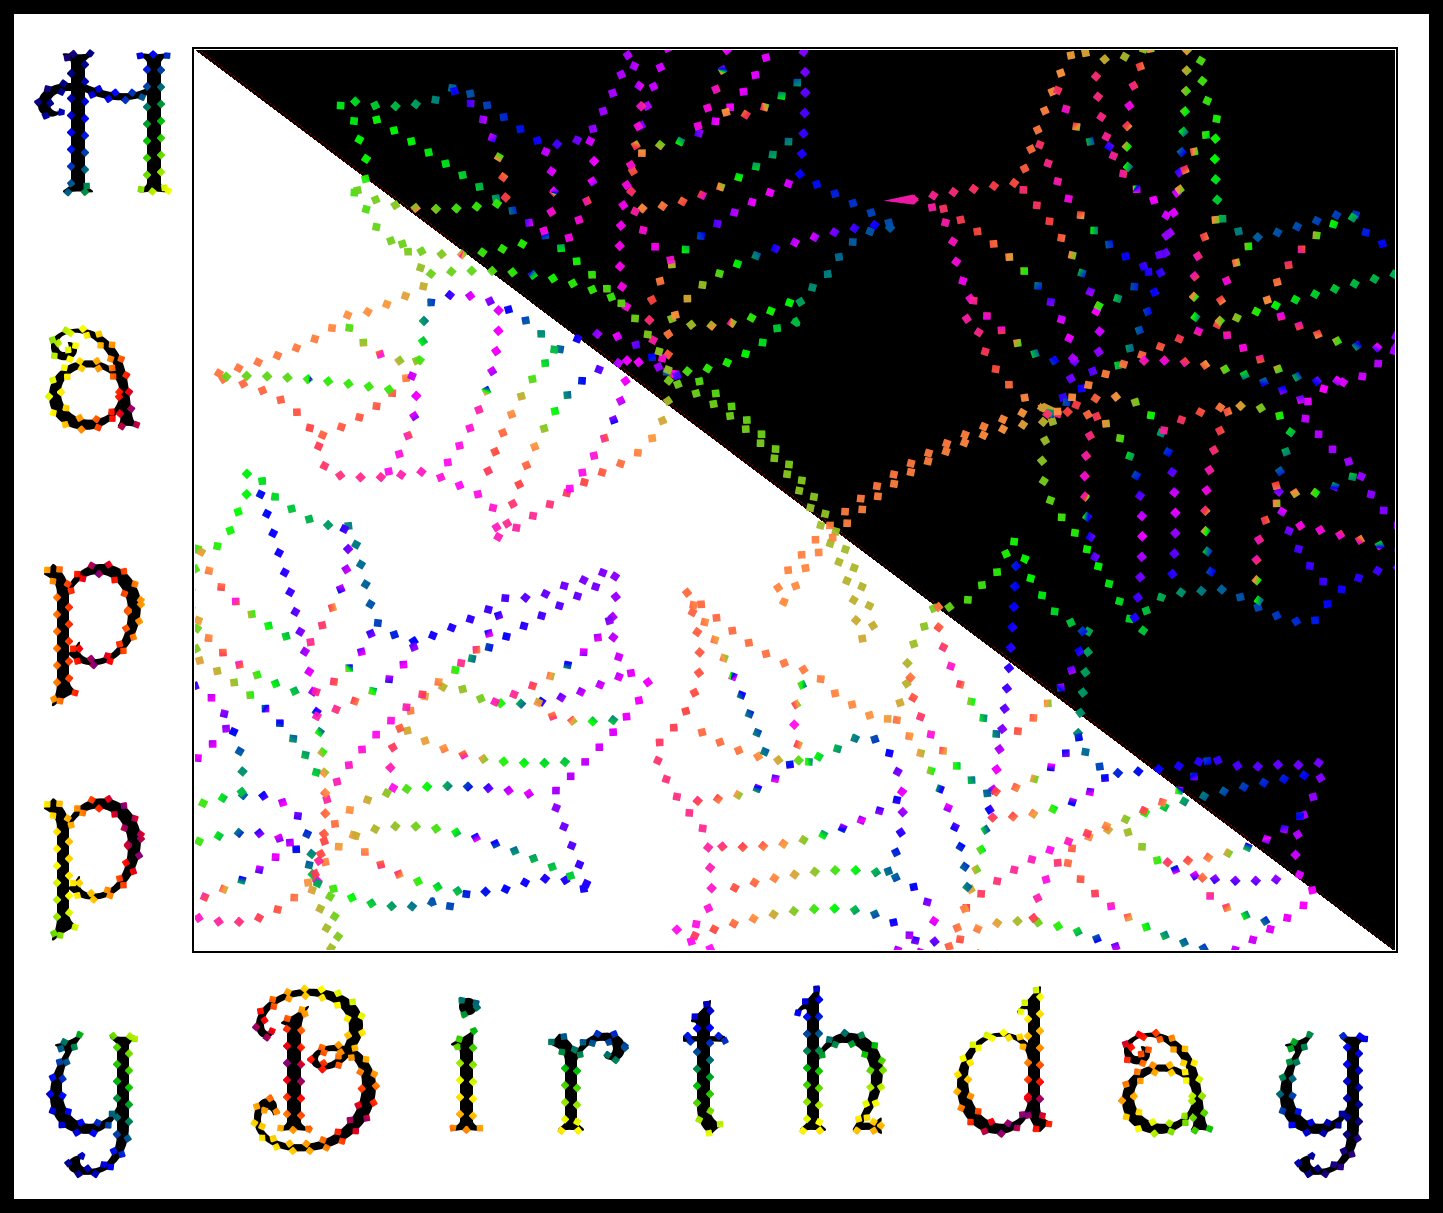
Today I was thinking about the fall leaves and how they are kind of past their peak where I live. I wanted to make one last fall leaf "happy birthday" image before the cold weather (and snow) moves in. I have several relatives with birthdays in early November, so I'm sure this will make a nice card for at least one of them. I just made some vector leaves and played around with the strokes, giving the leaves a diamond outline. I used a half white and half black background (to signify the changing seasons), then added "happy birthday" with the same diamond outline and a black fill.

Dancing ribbons is what I call today's artwork. :) I used the interpolate function in Inkscape, pretty colors and gradients, and a fair amount of duplicating.

Today's illustration is an experiment in colors. I chose orange and green and used quite a few shades in between. I made it using a kaleidoscope effect, and then cut it in half and mirrored both halves and put them back together as opposites.

Today's design is sort of a wheel/kaleidoscope/flower. :) I made the kaleidoscope design using gradients, added a single black flower (stretched) then put the entire design on a rainbow gradient background that also had a topography filter used on it.

A stamp-edged, woven, patchwork design. I used a number of filters in PaintshopPro to created this unique design: a swirl, a wave, and a weave.

This is an image of some petunias that I filtered through a tiling feature in PaintshopPro. I also used a pastel filter on it. I'm babysitting my nieces and nephews, so I didn't spend much time with my illustration today.

Today's illustration is a kind of outer space scene. I made a burst of light on blue and ran it through a mosaic filter, then I added an oval with a gradient and layered some stars on top. That's about it.

I felt like playing around with the halftone design again today. This time I turned it in to a sort of psychedelic optical illusion reminiscent of '60s art. It was fun and I like the way it turned out. I just used the halftone vector that I created last week, duplicated it, and played around with color gradients until I found something I liked.

I got a special request for a snowman Christmas card from my sister-in-law (who has a daughter in college), so that is what I created for my challenge today. I might add snowflakes later, I'm not sure. Since I was in a hurry to make it, I used some 'ready-made' whitish vector buttons for the snowpeople, then added similar vector buttons for their eyes and mouths and snowman buttons. Same with the hats and shoes(previously created - and manipulated by me). I also shaped, recolored, and resized them all, and I did everything else by hand. :)

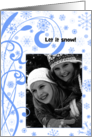
We just got back from visiting our daughter in PA, and I'm too tired to make anything that will take a lot of effort today. So I'm using the kaleidoscope design from day 87 and tiling it into a frame for a "Thinking of You" card. I then clipped out an oval center and added a greenish-blueish-purple gradient that has a mother-of-pearl look to it and then added the text. :)

I created a blob collage for today's graphic. I saw a tutorial for making something like this in Illustrator, which has a mesh tool that lets you mold gradients in a project; but I don't have Illustrator, so I tried to make it in PaintShop Pro v8. Alas, the results are only mediocre, but it was kind of fun. I just made blob shapes, gave each one a different gradient fill with partial opacity, and then layered them.

Today's artwork is a kaleidoscopic design that I made while playing around with filters again (I do LOVE filters!). It's hard to know what you're going to end up with until you experiment and see. :)

I decided to make a Christmas tree ornament for today's challenge. I'm going to layer it on top of a pine tree background for a Christmas greeting card. :) I started with a kaleidoscope image that I made using gradient color mixtures, then I ran it through a halftone filter and then the kaleidoscope filter. I then layered some rings for outer borders (the light green, lavender and mauve) and then I added some gradients to make it look more like a ball than a flat circle. I gave it a little topper and that's it.

Today's project is basically an update of the penguin I made on day 75. I added snow, a gradient sky, and a cool reflection that I think makes it very card-worthy now. Actually, I've turned it in to both a birthday and a Christmas card. :) The reflection was just a matter of duplicating the penguin and putting the duplicate under the ice and snow.
I'm delighted with the way it turned out. :)

Today I felt like making a unique mosaic. I used several filters to get the art to this point. I started with a a radial rainbow gradient, turned it into a kaleidoscope design, then turned that into a pattern design, followed by a vertical blind filter and a horizontal blind filter. :) The process was fun.

Time for another butterfly. I just took vector pieces and put them together and then gave the individual pieces gradient fills. That was about it. Oh, and I put it on a yellow background to make it more cheerful. :)

This is a halftone circle stamp that I converted to a vector and then used some strategically placed vector gradients to bring it to life. I learned a lot today about turning stamps (or raster images) into vectors and I really, REALLY love the technique. :)

Today I was in a 70's mood reminiscing about this girl in my junior high school class who used to draw pretty mushrooms and "love" inside a heart. Her drawings looked better than mine, but this is what I felt like creating at the moment. It's just vector letters that I drew in Inkscape, filled with gradients and fit inside a heart. Then I put it all on a bubble background, and that's it. :)

Today's artwork (the circle of people, at least) was created for a poster contest that I just entered. If I win, I'll give you more details later. :) Other than that, I'm not going to say much else about the contest because I don't want to jinx it for me. Lol.
Basically, I made a paper person in Inkscape, then cut it in half so I could color each half a different shade of the same color. I duplicated the people and used different colors, then I formed them in a circle so they could hold hands. :) Finally, I added a heart in the center so they'd have something to revolve around.

Flowers seemed like the appropriate thing to create today. I made some circles, gave them 50% transparency, then put them in the shape of flowers. I made several duplicates, added different colored centers and then some stems, and that's it.


Today I'm very sad (as is the rest of the world) with the passing of Steve Jobs. So I created this image in his memory, and to honor him.
My very first personal computer was a Macintosh Plus that my husband and I purchased around 1988. My very first digital artwork was created (in monochrome) on that very computer. Rest in Peace to a brilliant visionary.

Swoosh! Nothin' but net! Today's illustration was created when a GCU customer requested a basketball card. :) Fingers crossed that she purchases mine. :)
It's just another vector image that I breezed through using the bezier pen, gradients, some simple shapes, and layers...plus some strategically placed text and movement lines.

So . . . I've been thinking about cancer a little too much over the past few days and I wanted to get my mind in a happier place. So how about a perky purple penguin for my project today?
This light-hearted, happy-go-lucky little vector fella is having lotsa fun slip-sliding on the ice. Not that I want winter to get here anytime soon, but it just seemed like a cheerful thing to make. And he was. I just created some vector shapes and layered them together so he would look cute as can be and then I added ice so he'd be right at home. :)

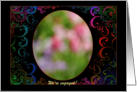
I was very much moved to create a cancer/encouragement card today. This somewhat abstract image shows a pink ribbon-like woman spinning among starbursts, hearts, and colorful prisms. I turned it into a metaphysically profound card that says this on the front: "I’m going to spin counter clockwise as often as I can because each time I go round I am stealing some of Earth’s angular momentum, making it slow down a little so the nights will be longer and sunrise will come a bit later." "Why?" and then the inside says: "Because it will give me a little more time here with you. We'll beat this cancer so we can rob the disease of its capability to shorten our time together." (Thanks to an XKCD comic for the idea).
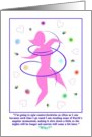 P.S. yes, I reused the prisms from yesterday's challenge.
Update: My card that used this image was chosen as Greeting Card Universe's Design of the Day for October 3, 2011! A very humbling honor, indeed.

Spectrums and prisms. That's what today's challenge, a prism tree, reminds me of. It's also pretty much how my day has been. I wrote a blog post for GCUCommunity's latest blog carnival about Cancer earlier this aftrnoon. THAT brought back some memories. One of the main things I remember was when I had to go to the cancer hospital for chemo (a two-hour drive from us) and my husband would take our two young kids to the nearby COSI (Center of Science and Industry). That place is AWESOME and fun, but it wasn't much fun for me going to see the doctor and getting my veins filled with chemicals. Anyhow, COSI has a spectrum tree that I LOVE. My challenge today took me back to those days (as did my blog post).

Today's challenge is a Christmas photo card (I need to make more of these!). I made some musical notes and then used the text-on-a-path feature to make the text match the music. Then I added some lyrics from "It Came Upon A Midnight Clear" to finish it off. Here is what it looks like with a stock photo from Greeting Card Universe.


Today's design is a quick and easy woven photo frame. I created a pretty plaid pattern using lots of bright colors, then I used a weave filter in PaintShop Pro on it to give it an interesting dimension. :)

Here is another photo frame. I was going for a Christmassy look, but I may have gotten carried away with the hearts. Lol. Basically, I put some Christmas colors on a canvas and used a filter to turn them into even stripes, then joined the horizontal stripes with the vertical ones to make a nice corner. I then cut away most of it, added hearts around the border, and added a little corner piece at the bottom. :) I don't have it set up for a photo card yet, but when I do I'll add it here. :)

I needed a bright, cheerful birthday card today so I made this and decided it's cute enough for my daily challenge. :) I used a cloud texture for the background and used a pattern for the text. I played around with the colors for awhile till I got what I wanted, and voila! :)

I was reminded of how much I like making pop art designs when I submitted my pop art Christmas card for critiquing recently. So here is today's challenge...more pop art! :) I made the vase and the star petal shapes for the flowers in Inkscape, and I did everything else in PaintShop Pro - which has a good halftone filter that lets me make cool colored dots. :)

Today's challenge was just that, a challenge. :-/ My PC was running so slow today that I didn't think I'd be able to finish. I added scenery to the fox that I made on Day 60, but with all the separate leaves on each of the trees, it was really bogging my computer down. It's vector trees with vector leaves and vector grass, plus the gradient blue background is a vector, too. Finally, I duplicated the big fox and shrunk it down to make a baby fox. :)

Love beads on a psychedelic background. :) I'm working on a separate project which is taking up a lot of my time, so for today's challenge I just wrote the word "Love" using a bead line and a drop shadow, and then put it on a colorful background that used 2 wave filters and a half-tone filter. My son thinks it's "interesting" ...maybe that's his polite way of saying he's not impressed. Oh well; maybe a better illustration tomorrow. :)

A ring of ferns. I started with a stem, added leaves on both sides to make it fern-like, added gradients, and then duplicated them. It wasn't difficult at all, and I think the effect looks pretty nice. I'm happy with it. :)
P.S. 300 illustrations to go. :)

I've been nursing an awful backache all day today, and can't comfortably sit down to work on art for very long. So I whipped up this quickie. I painted colorful squiggles on the canvas and added a smiley face who is grimacing (like me) and a speech bubble with text. That's it for today.

I went ahead and finished the second part of yesterday's image by putting the boys on their bikes today. :) Just a vector person which was then duplicated and parts were rearranged as well as changing the clothing colors and hair color. If I work on this image any more in the future, it will be to add scenery and a background. I definitely like creating images over the span of a couple of days; so I'll probably do more of this kind of work for future daily illustrations. :)

Today's illustration is part one of a two part project. I'm working on a birthday card for my twin nephews, and today I made the bikes. It's just a vector graphic that I created in Inkscape, but it took a lot longer than I anticipated, so I'll have to make the two riders another time and use them for a future challenge. Luckily, their birthday isn't until November...so I have plenty of time. :)

Recently, I was inspired by Mary McQueen (who is a fellow member of a Greeting Card Association group I'm in) and her lovebirds, and the unique way they create greeting cards together. I will post a link in my blog about her soon. Anyhow, I created this cute lovebird in Inkscape - it's just a vector graphic - to honor her feathered co-artist. :)

This is a fox I made this evening, and I'll be honest with you...it took me quite a bit longer than I expected it would when I started it. But I'm glad I made it. I did it in Inkscape. Now if you're a digital artist, you might think I did it with a Wacom tablet. But I did not. I merely created specific shapes (ie: the legs, tail, face and ears) and then used Inkscape's union function to put them together for the orange body. Then I added the the colored pieces on top.

Today's challenge was just an easy piece. :) My son is visiting and I wanted to spend time with him rather than on the PC. Just a couple of vector speech/thought bubbles on a blue gradient background. I also want to make this into a card, but I couldn't find a good category to put it in (plus, I don't know if GCU will approve it). But if they do, the inside says (I ain't listenin'). Lol!

I'm still working on anniversary cards, and created this cute couple of chipmonks today. I'll probably still need to work on it over the next couple of days before I'm happy enough to make a card with it...but it's a start. Just a simple vector graphic with a gradient background. The vector grass is from an earlier image.
Update: these chipmonks seriously needed something added to the picture, so I gave them some love. :)

Next week is Mike's and my anniversary, so I was working on a card for him. I made this vector image of a lion and lioness, but I'm not happy enough with them to make it into the card I will give him. So I'm using it as my challenge instead. :)
Although I might turn it in to a card at some point. ;)

Today I reworked an earlier design of mine which I updated to (hopefully) fill a request by a customer for a christening card for triplet girls. I spent a fair amount of time working on this image today, as well as setting up a new blog (and archive) to share Greetingcarduniverse.com's Design of the Day picks. The blog is here, and the archive of previous months' picks is here.

Today I made some petunias so I'd have something to go with the hummingbird that I made on day 37. I also put it together with the hummingbird in a format that is suitable for GCU. Below is that piece as well (although text will be added later).


Today's entry is a Christmas photo card I just finished. It has a nice sprucie brush tip texture, and colorful lights. Hope my sister sees this in case she's interested. :-D

Just a simple Christmas card today because I'm trying to familiarize myself more with Gimp and I basically wanted to do something easy to begin with. Just used some various brush tips to paint this one up. :)

Today's contribution was inspired by my aunt who had to move to a nursing home recently. I send her cards from time to time, but I realized the one I sent her today is the last of my butterfly cards that she hasn't seen (she loves butterflies). So it's time to make more. :-D This card was all about gradients. Every item in it is colored with gradients in some manner except the text and the little swirlies beneath each butterfly. It's easy to make cards when they're inspired by love. :-D

I worked on Christmas cards again today, and this one was my best. I just used a checkerboard brush tip that I made and painted the design on in shades of green and red. Here it is on GCU with a stock photo.

Yes, I know, today's entry looks suspiciously similar to yesterday's challenge. That's because GCU requested that I submit the one from yesterday to a couple of other categories, and I thought the image could be improved. So I worked on it to make it more appealing by bringing the teeth together and adding a jaw and neck. Then I went on to make it with different skin and lip colors. It took me awhile and I didn't have time to do anything else for my challenge today (plus my son is moving back to campus tomorrow and I'd like to spend my time with him rather than at the computer), so this is a montage of my three favorite versions--though I did several more.

Open Wide! Actually, this image is for an Open House card (for orthodontists and dentists). :D If it's seen out of context it's a little disturbing, though, isn't it? Lol. I made it (in the wee hours this morning) because GCU had a special request from a customer for a card that has something to do with braces. :D So this is my contribution. I just drew some pearly whites and added rounded squares and lines for the braces, then put it together with some lips and a tongue for a nice bright smile. :D

After yesterday's disappointing entry, I thought I'd switch to animals, and bypass people for a bit. :) This is a cute owl I created, and it was very fun to make. In the process, I learned how to add that dark outline cartoonists often use in their work. In Inkscape, select each piece of the picture (the individual owl parts, the leaves, and even the tree were all outlined using this method) and apply the 'linked offset' command to them separately. It's funny that I've long admired that added detail in cartoons, but until now I thought a thick line was just drawn around everything. This way is SO much easier. :)
 Update: This is a record for me . . . I created the illustration this morning and got a card--using the image--approved by GCU this afternoon! :-D
Here's the card.

I created this girl behind a podium, but I'm unhappy with her eyes and her head looks too big for the picture. I'm out of time to work on today's challenge, though, so I'll just have to upload it now even if I'm not satisfied.
:-Þ I guess I don't have very good 'people skills' in my illustrations. lol. Good to know...so I can work on those (heh heh).

Thank you for understanding. :-D I had to do my challenge project real early this morning (it's just after 1AM as I'm writing this). I needed to make something quick and get it uploaded now because we are going to my daughter's soon. I just used a swirl brush tip in PaintShop Pro and painted on some pastel swirls; then I added the text and border.

My Heart Melts for You.
I felt like making a card for the "I miss you" category, but then it started looking like a melting heart, so now I'm not sure if I'll turn it into a card or not. I just made some patchwork hearts with fuzzy outlines, drew a melted heart with a diamond outline, and added gradients, text and a border. :)

Today I used Corel Essentials again to paint this illustration of some yellow and orange flowers. I enjoyed doing it, but it was time consuming and I almost didn't get my challenge uploaded in time today. It probably could have used some more touching up, but I guess there comes a point when you just have to say "I'm done now."

Yesterday I mentioned a book I got that challenges designers. Today's challenge from the book is to create a typeface alphabet using found objects or environments. I happen to love flowers, and my flowers are still in bloom (it's Sept. 1, 2011 as I write this), so I decided to go out and find some colorful ones. :) I used petals, stems, ferns and some herbs.


I got a book today called Creative Workshop: 80 Challenges to Sharpen Your Design Skills

Today's challenge was a special request by my son. He wants to start a band and wanted to see what his band's name and logo would look like, so I created a mock design for him. lol. He wants to call his band "The Moustache Set" and he thinks the first song title might be "Love Like Something" or similar. So here is what I came up with for him. :)

Here is another Christmas photo frame card. I painted green leaves and red berries onto a colorful background and then added text. :) Here it is on GCU with a stock photo.


Today I wanted to make another photo frame. I created the "splatter" brush tip design and painted it all over the frame. Here it is at Greeting Card Universe with a stock photo.

Day 38 of 365:
I'm thinking about changing the header on my Greeting Card Universe store, and here is one option. I suppose this could be considered 'cheating' for my 365-day challenge since I already made the card images that I used in it, but my daughter is still visiting and I don't have much time for artwork again today. Lol.

Day 37 of 365:
Just a real quick doodle of a hummingbird today because my daughter and her boyfriend are here and we're playing cards. :-D


I was out of town today at a business meeting, and didn't have much time for my challenge. This is a quick photo frame using a swirly brush tip painted onto a black background. It can be used for a variety of cards, but the one I set it up for on Greeting Card Universe is an engagement photo card that you can see here.

I finally got another Christmas photo card made. :-) In this one I used a swirly brush tip from Gimp and five different snowflake brush tips that I created in PaintShop Pro. I think it looks nice with a black and white photo in it. Here is the card with a stock photo from Greeting Card Universe.

Stars, swirls, sparkles and twirls. :-) Today's was kind of a quickie. I didn't have much time to work on my challenge, but I am trying to get more accustomed to making and using brush tips. Everything in this image was done using different tips. I made the long pointy spikes on the right. The sparkles, stars and swirly "smoke" (the colorful background) tips were created by others.

Oh my stars! I was able to get today's challenge finished a lot earlier than normal, so I'll post it right away. :) I had sooooo much fun creating this project in Inkscape (mostly) and I didn't even use a tutorial! I figured out how to use the extrude function with the large stars. For the tiny stars and dark blue (night sky) background, I used a brush tip in Paintshop Pro that I created to 'paint' the stars onto the background--which I first filled with a 'sunburst' gradient going from lighter in the center to darker in the outer area. Finally, I copied the large stars that I created in Inkscape over to PSPro. I'm sure there are ways to complete the entire project in Inkscape, but I'm not at the point with my progress to know how yet. lol.

Today I decided to use the butterfly-rhinestone pattern on a path tutorial that I blogged about a few days ago. I did a whole bunch of cool things with the interpolate tool putting little dots on a variety of paths. I also used the 'generate from path>>inside-outside halo' feature to get the dotted-line border of the butterfly. In addition to creating the butterfly, I learned some really cool things about making paisley shapes. I'll be doing more with those in the days ahead, I'm sure. Anyhow, this butterfly was a lot of fun to make. :)

Today's illustration is another photo frame. This one is an anniversary frame. I have to get back to working on the Christmas ones, but as I was working on this one, it became more and more clear that it wasn't going to be for Christmas; and by the time I was finished (a little while ago) it was too late to start on another (it's almost 11:30PM now). So maybe tomorrow. Anyhow, I created a leafy paint brush tip and painted the leaves on the frame. The colors were serendipitous (not really what I was going for, but fine in the end). I just uploaded it to Greeting Card Universe a few minutes ago, so here is how it looks with a stock photo in it.
 Oh, and I wanted to comment on the leaves that are overhanging the transparent section (where the photo goes). I didn't intend for the leaves to turn out lighter there; but after I was finished, I thought it looked kind of interesting, so I left it as is. I don't know if it will pass the review processes at GCU, but we'll see. :)
Happiness is . . . zinnias! :-D
I love them and that they grow in so many colors. So that's what today's challenge project is based on. I created a ring of petals, then duplicated and shrank it over and over (each on it's own level) until I had what looked (to me) like a zinnia. Then I did a drop shadow on each level to give the petals definition and a pop-like look. After that, I duplicated and varied the color on several copies, and added some text.

I finished today's challenge early (REAL early). I was working on it at 3AM this morning (so it counts for today - lol!) My wonderful sister is buying some cards from me this afternoon, so a guaranteed sale was a strong motivating factor to get it done asap (thanks, Jen... I love you!!). And she specifically requested cards for boys.
I made the rocket with some gradients, and the text was done by drawing the shape I wanted it to flow in, and then using the 'text on a path' technique. The stardust contrail was a fill I had made awhile back. I added stars and a gradient to the sky, and I was done. :-) Fun, fun, fun!

I created this little gift today while I was working on birthday cards for my niece to choose from for her best friend (although I didn't use the gift image in any of them yet). I didn't have a lot of time to work on my challenge project today, so I made it simple. :-) I WAS working hard, though. Here are the cards I made (and the last one is one that I made for a request for a wedding card). Most of them use previous "Daily Challenge" projects.


Day 27 of 365:
I thought I would try something different today. I was inspired by Doreen from her GCUCommunity Design Spotlight where she shared an adorable digital drawing that she did of her "Smug Pug" and it made me want to make a digital drawing of my daughter's kitten, Luna. So here it is; although it looks more like a digital painting than drawing - in my opinion - lol. I think I switched techniques mid-way. It took me several hours. I'm new at digital sketching (and my Wacom), so perhaps some people are wondering how this picture could possibly have taken me several hours, but it did. And now I don't have time to do anything else for my daily illustration challenge, so this is it. Lol.

:-)
Here is the original picture of Luna that I was using as my model. There are some similarities between my sketch and the photograph; but I can't say this is my new favorite art technique, because it certainly isn't! It's just too time-consuming. All in all, though, I'm very glad I did it. I did learn quite a bit today. :-D

There was a general request on the Greeting Card Universe forum today to create "back to middle school" cards, so I decided to use that for my daily illustration today. Lot's of leaves. :-) Plus a simple box of text on top of the leaves. And the inside is just a little rhyme I put together that continues from the front:
(The end of summer is here!)
The beginning of autumn is near ~
When the leaves start to fall,
your time left is small . . .
then it’s back to middle school, my dear!

Here is another Christmas photo card/frame. This one is bold and bright, for folks looking for something non-traditional for their Christmas photo cards. :)
It was fun coming up with the design. Like an earlier card, I used the halftone technique from my art program to get the look I was going for. Then I added some fun text that I thought would go nicely with the background.
 Here is what it looks like with a stock photo from Greeting Card Universe.
My first customizable Christmas Photo Card. Lots of snowflakes. :-)
I created several snowflake brush tips and just went to town with them. Added a bow and some text...and that's all she wrote. :-)
 Here's what it looks like with a stock photo in it (click for larger view).
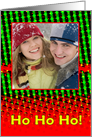
Oh Christmas Tree, Oh Christmas Tree . . . (lol)
Some of my relatives are going to order Christmas cards from me this year, so I need to get some made. :) Therefore, along with the photo cards that I promised I'd be making, a lot of my 365-Day Challenge projects will also be Christmas cards. This one is a tree made of snowflakes with a simple gold-tone star and base. I was going for a more simplistic background so I didn't want to use gradients. However, I felt it did need spicing up, so I cut out a rectangle around the tree and mirrored it. :)

I made another photo card today; this one is to celebrate a birthday using bright and cheerful colors. :-) I added a halftone design (twice, actually) to get the opaque stripes and dots on the upper two thirds of the card; and then I used the 'rotating mirror' technique in PaintShop Pro to get the vertical stripes at the bottom.
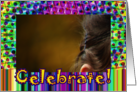 The word "Celebrate" uses the Jokerman font. These photo cards are really enjoyable to make, so I'm very certain that there are more to come for my 365-Day Challenge contributions. :-)
Day 21 of 365:
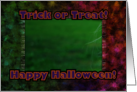
Today I felt it was time to make another Halloween card. This one is a photo-frame card, and I had lots of fun making it. It has a tattered look to it (sort of the way costumes begin to look after a few hours of wear and tear - lol), but it's definitely making use of Halloween colors. Especially in the text. :-)
The inside says: Be afraid ... Be VERY afraid :-)
 Here is the card with a stock photo from Greeting Card Universe in it (click on it to see a larger version):
Flower Pot of Posies. This one was all about layers and drop shadows; almost entirely, as a matter of fact. No gradients or interpolating...but a lot of duplicating of the posies. Lol. I'm happy to be learning about layering, but I'll admit that this one took a long time because of trial and error. Hopefully future layering projects won't take so long. :-)

Whoa, I almost didn't get an illustration made today...so busy! This is just a quick one. I made a butterfly, a flower and some leaves with gradients & a few details; I split it at the stem so I could give each side a different color; and finally I added some text. The inside will say something about soaring to reach one's goals. :-)
Update: I put the groups of items on different layers so I could add drop shadows to everything to help make it pop.

Yes, this is an Easter Card front. I was fiddling around with some of the effects in PaintShop Pro (especially the mirrored reflection) and came up with this background. It looked suitable for Easter, so I added text and a drop shadow. However, it is not the right size and resolution for a card at GCU, so I'll have to see if I can fix that before I submit it. I still had fun, and that's what matters. :-)

Just a little Valentine card...nothing special about it. I didn't have a whole lot of time to work on my daily challenge project today, so this is what I managed to come up with under limited conditions. :-) Tried some new things with the inset/outset halo feature in Inkscape to get the outlines on the "You + Me" (and to a lesser degree on the double hearts).

Greeting Card Universe will be rolling out a very cool new feature in a few weeks that allows customers to create their own text on the front of their own customized photo card. It's very neat, and I created this photo frame earlier this morning (currently GCU is in the testing phase of this new feature). I used a specially designed brush tip and some unique gradients that I came up with and basically 'painted' the design onto the canvas of the image. Then I cut out a portion of the center and added a thin line inside for the border of the photo, and voila! Cool new photo frame! :-)
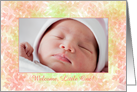 Here's what it looks like with a stock photo in it. If you were to order this card (for a mere $3.00 -- or LESS, per card, if you buy 5 or more), then you would contact me to have your photo inserted. However, after the new rollout of this feature in a few weeks, you'll be able to just upload your own photo and insert it, and change the text to what you want. Very cool. :-) This small card is clickable if you'd like to see a larger version.
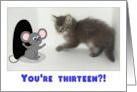
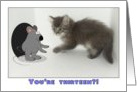
This cute little mouse was needed to replace another mouse that wasn't at all cute...as a matter of fact, it was kind of disturbing to look at. Lol. Here is the new card followed by the (hard-to-look-at) original.

Doing it Andy Warhol Style.
I saw a recent example of an Andy Warhol style card in GCU’s Critique Clinic a week or two ago that I adored. I decided to try my own hand at emulating Warhol's style somewhat. I actually photographed this marigold several years ago, but I manipulated it in different art programs/filters so much that I feel I can now call it an illustration. :-)

This marks the end of my first two weeks doing this challenge. I’ve already come away with more inspiration, more information on techniques, and a greater love for illustrating, in general, than I ever could have imagined. I consider my work, thus far, a success and I’m looking forward to the next 50 weeks.

Just a square full of spheres. I was playin' around with some filters today; nothing much to tell about it. I started with one design and I filtered it many times over. Then I ended up with this. lol. I guess the spheres remind me of Christmas ornaments, and it's probably about time to start making Christmas cards if you're in the business. So my artful psyche might be trying to tell me something. :-)

Urban design with circles. I used this tutorial by Very Simple Designs to guide me in creating this urban design of my own. Also, I used color suggestions from GCUCommunity's Rainbow Connection this week. I like how it turned out, so I'm using a cut-out section of it to create a birthday card. Here is that very card! My son said the circles reminded him of designs from ancient civilizations... so I went with the humor of it for this card. Lol!

An alien flower on an island at sunset. This was total fun because I didn't restrict myself to making anything recognizable. I used Inkscape's interpolate tool (my fave) for the flower and the root base. I used the spiro path to create the stem. And I used various gradient styles for the island, sunset and border. :-) I'm a happy artsy-fartsy camper today. lol!

Sun shining in the morning. It's how I feel to have my son back home after he spent July helping his grampa (who was recuperating from surgery). Today was a beautiful morning. :-) It would have been totally perfect if my daughter were here, too.
Anyhow, I started with an image of a tree enhanced digitally to look like it was done in water colors. Then I added the window frame and border to make it appear one was looking out a window.

These are just some quick "Doodle-Dee-Doos" because my son is coming home later today (after being away at his grampa's house for a month), and I need to get a few things done before he gets here. The animal drawings were done in Inkscape to practice my cartooning technique. I have a long ways to go, so any extra doodling I do will help. Lol. The ball in the center was made (also in Inkscape) using the interpolate tool on two half circles (I LOVE the interpolate tool!).

Halloween is just around the corner! (at least if you create greeting cards for a living.) I wanted to make a Halloween card today, and this is the result. The background was just me playing around with stars, bursts and swirls. The *trick* (haha) was to use lots of black, orange, green and blue (with plenty of yellow sprinkled about for good measure). I also took the center of the card and used a ‘feedback’ filter to make the center area shrink smaller and smaller. Then I took a plain black and orange starburst and used a ‘twirl’ filter to make it look a little like it was being sucked into a black hole (hint: that’s what the inside of the card will mention, but I’ll wait till it’s approved [fingers crossed] to reveal exactly what it says – lol!).
 Update . . . here's the approved (and improved) card:
And the inside verse is this:
"Trick? or Treat?
It's an age-old question befuddling
folks since the beginning of time.
Don't get sucked into any black holes
while you're making up your mind.
Hope your Halloween is spectacular!"

I warned you that I was going to do cartoons occasionally, didn't I? Lol. My sister needed a card *NOW* to send to her friend who is turning 40 this Friday. I worked on this image (of a woman dancing) in the wee hours this morning, so it counts for today's daily. ;-) Anyhow, it shows my style when I'm working very fast (this took me less than a half hour). Compare it to the girl sitting on her legs (below) and you can see the impact that time (or lack of) can have on my work. Actually, though, I'm hoping to develop a style somewhere in between, and I wanted both of these images available for comparison in the future. Oh yeah, the inside of the card says "Now that you've joined "The Club" we can ALL do our happy dance!" :-) (Jen-- who's 40+ --says she teases Tiff about joining the "40+ Club" a lot)
P.S. Thanks for buying cards from me, Jen! I'll do better on future cards for you, but try to give me at least one week notice. ;-)

Yes, this one shows similarities to the fishbowl on the table (below), but I included a tablecloth to go with these flowers. Lol. Charming, eh? I know, I know, there are no such flowers in real life like these...but it's art...so talk to the hand. ;-) The hand that drew them, get it?

Okay, I'm going to have to admit to some "cheating" today. I actually created the swirls and dots in these two images a week or so ago...and I just incorporated them into today's illustration. But I have a good reason. It's been hotter than heck around here and today's the first nice day we've had in quite awhile and I want to go outside and enjoy it. All of my art programs are on my desktop, and it is not portable. :-( So in the interest of making it up to you, I'm posting two versions of this piece. :-) I started with a black background and added the white swirls, dots and text. It was interesting, but then I experimented with gradients and just went to town with them. :-) Obviously the swirls needed a sentiment to go along with them so "Thinking of You" seemed appropriate (also making both of these illustrations viable options for some new cards - lol).

I like how this fish turned out except I think I could have spent more time to make the fins look better. I'm also impressed with how realistic the table looks. :-) The bubbles even look cute. lol. This illustration uses a lot of gradients...so it was a good learning experience in that area.

Yes, today's illustration was MUCH easier than yesterday's. It took me less than an hour to "weave" this one together. :-D It's a patterned background that I gave a woven look to, and I decided to add a "Thank You" so I could upload it to Greeting Card Universe and hopefully make some sales with it. :-D

Boy, I sure wish I could say I'm satisfied with the way this young girl sitting on her knees holding a "miss you" card turned out, but I'm not entirely pleased. I've just spent several hours working on it, and I'm tired. I did learn some things with the legs and arms and how to layer them in such a way that they overlap properly to look almost human, though; and that was good. The point in my doing this is to learn new illustration skills, so in that regard, I succeeded today. :-) But tomorrow, I think maybe I will choose an easier subject. I don't wan't to learn everything all in one day! lol.

Day 1 of 365:
I was inspired by Tracie of Photography TK Designs with her 365 Day Photography Challenge. She takes photographs every day to improve her skills. I want to do the same thing, except with illustrations. I want to improve my technique and learn new skills. Some days I'll do cartoons, some days I'll do non-cartoon illustrations, and some days maybe I'll do a combination.
But for my very first illustration, I was playing around with the bezier tool in Paint Shop Pro and came up with some blueish flowers with star-shaped centers. They looked lonely, though, so I added some red posies and leaves. The red posies started out as one that I just duplicated over and over and changed size/shape. After all that, I added a border and some text and decided to turn it in to a greeting card.
Oh, and I chose today (July 21, 2011) to begin the challenge because when I'm exactly halfway through, it will be my birthday. :)